I am getting ready to start painting my new artist resin this afternoon, and I decided to do sort of step but step on this horse. So everyone will be able to see the horse go from a beautifull looking resin to a horrible looking "Let's hide this one in the back" resin.
First step is to prep the horse. I use Krylon's spray Primer. I usually use white, but if I am painting a dark colored horse with no white, then I was grey or even black. I bought some and use it when I don't have to use the white to make the white primer last a little longer. This horse was pretty close to white when I got him. But I primed him anyways. I did 4 thin coats and it was enough.

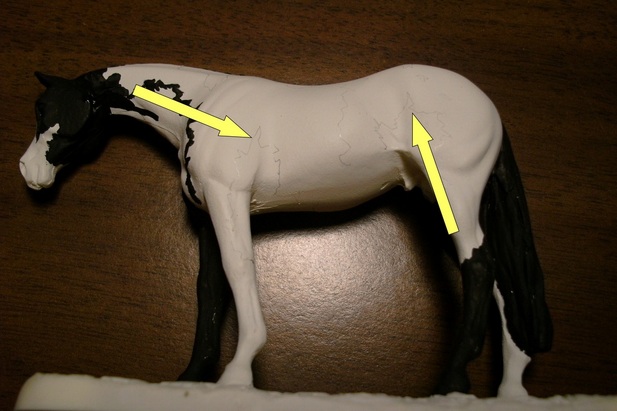
The shine on him is from the camera. He was done with a matte white primer.
The next step for me is to pencil out the pattern, if there is one. The horse will have a louder pattern on one side and a "quieter" side. I know that it is a little hard to see, so I put arrows in, but the pencil lines allow me to paint without having to worry about where to put my paint brush. When I do the first coat, I go right up to the line and stop. The detail work I will be doing later on will cover any pencil marks that don't get covered with the first layer.
Sorry, I forgot to take a pic before I started painting, but you get the idea
Here he is with his first coat of paint on. I did both sides, but I wait like 10 - 15 mins in between each side so that I don't smudge the wet paint. I will add a couple more layers of paint so that his color is really deep and bold. Again, I am not doing any detail work on his pattern yet. I like to get most of the pattern blocked out before I even start thinking about details. I know the pics suck, but you can see the pattern.
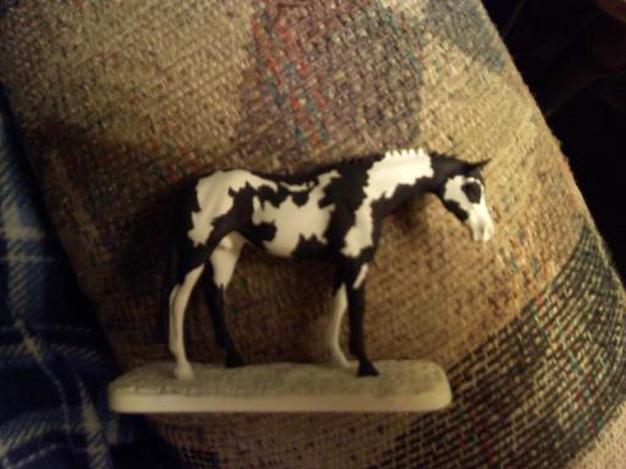
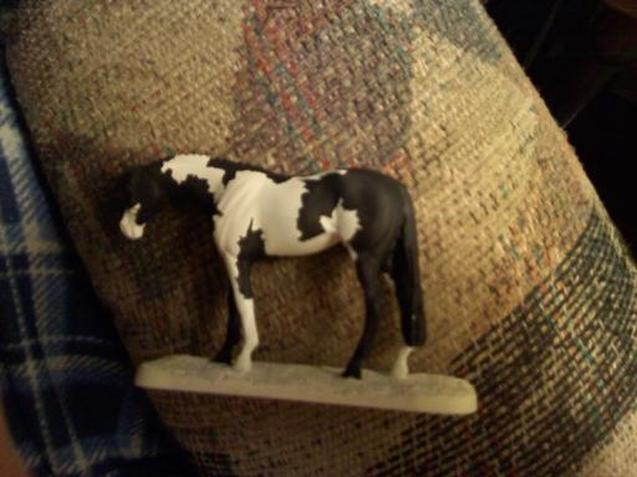
I really like the second side (second pic) a lot. I think that it fits the horse perfectly. I am going to be making some changes to the other side. I think that the pattern is just a little too wild for the horse. I am going to paint over a few spots, just to make it a little more balenced.
The next step for this horse is some detailing. This is the hardest part for me. Especially when I have a pattern I really like. When I do detailing on an overo, I go over the edges of the pattern with the finest brush I can find. I add lines to the pattern to give it rough edges. Overos do not have smooth pattern lines like Tobianos do, they have rough and "sharp" edges to their patterns. This step takes the longest to paint for me. Sometimes the marks I add are too big, and if that happens, I have to change to pattern a little. After I get that done I look at the whole horse from a little distance away. I look at the horse as a whole to make sure everything looks good together, then I look at certain parts to make sure that they look realistic.
My next step will be to paint hooves, then to paint eyes, which I think is the hardest!
I will cover that in the next blog!! Stay tuned!!!!
My next step will be to paint hooves, then to paint eyes, which I think is the hardest!
I will cover that in the next blog!! Stay tuned!!!!
